Pages
▼
Sunday, December 4, 2011
Quilava
I made a small version of this ages ago (not pictured here--I'll try to take one later), but didn't have the color yarn for the back, so I couldn't finish a normal size. Then of course I got it but I didn't have the material for the legs with me. Finally over Thanksgiving I managed to get all the pieces together and I was able to finish it today (in between working on my Christmas gifts and doing school work, of course ~_^). Hope you like it!
Materials
Yarn in teal, pale yellow, small amounts regular yellow and orange
Red, black and white felt
Stuffing
Body
With yellow, ch 2
Rnd 1: 3 sc in 2nd ch from hook (3 sc)
Rnd 2: 2 sc in each sc around (6 sc)
Rnd 3: sc in next sc, 2 sc in next sc around (9 sc)
Rnd 4: sc in next 2 sc, 2 sc in next sc around (12 sc)
Rnd 5: sc in next 3 sc, 2 sc in next sc around (15 sc)
Rnd 6: sc in next 4 sc, 2 sc in next sc around (18 sc)
Rnd 7: sc in next 5 sc, 2 sc in next sc around (21 sc)
Rnd 8-12: sc in each sc around
Rnd 13-20: sc in next 5 sc, sc dec in next 2 sc, sc in next 10 sc, 2 sc in next sc, sc in remaining 6 sc
Begin stuffing, continue stuffing as you go
Rnd 21-40: sc in each sc around
Rnd 41: sc in next 4 sc, sc dec in next 2 sc around (18 sc)
Rnd 42: sc in next 1 sc, sc dec in next 2 sc around (12 sc)
Rnd 43: sc dec around (6 sc)
Fasten off.
Back
With teal, ch 4
Row 1: sc in second ch from hook and each ch space across (3 sc)
Row 2: 2 sc in first and last sc (5 sc)
Row 3-9: repeat row 2 (19 sc at end of Row 9)
Row 10-40: sc in each sc across
Row 41: sc dec in each 2 sc across except middle sc (10 sc)
Row 42: sc dec in each 2 sc across (5 sc)
Row 43: sc dec in first 2 sc, sc in next sc, sc dec in last 2 sc (3 sc)
Fasten off.
Sew to body, stuffing lightly if you desire.
Ears (Make 2)
With teal, ch 7
Row 1: sc in second ch from hook and each ch space across (6 sc)
Row 2: sc dec in first 2 sc, sc in each sc across (5 sc)
Row 3: sc in each sc across, sc dec in last 2 sc (4 sc)
Row 4-6: repeat rows 2-3 once and row 2 again (1 sc in last row)
Working around, sc around on 2 sides
Fasten off.
Sew to head.
Front legs (make 2)
With pale yellow, ch 2
Rnd 1: 6 sc in 2nd ch from hook (6 sc)
Rnd 2: 2 sc in each sc around (12 sc)
Rnd 3-9: sc in each sc around
Row 10: sc in 4 sc across, turn (4 sc)
Row 11: (reverse shaping for other leg) sc dec in first 2 sc, sc in each sc across, 2 sc in last sc (4 sc)
Row 12: 2 sc in first sc, sc in each sc across, sc dec in last 2 sc (4 sc)
Row 13-4: repeat rows 11-2
Fasten off.
Stuff lightly, sew to body.
Back legs (make 2)
With pale yellow, ch 2
Rnd 1: 6 sc in 2nd ch from hook (6 sc)
Rnd 2-9: sc in each sc around
Do not stuff.
Row 10: Fold in half, through both thicknesses, sc dec through all sc (1 sc)
Fasten off.
Sew to body.
Head flame
With yellow, ch 5
Row 1: sc in second ch from hook and each ch space across (4 sc)
Row 2 and 3: sl st in first 2 sc, ch 3, sc in second ch from hook and each ch space across and remaining sc (4 sc)
Row 4: sc in next 2 sc, ch 2, turn
Row 5: sc in second ch from hook and each ch space across and remaining sc
Fasten off.
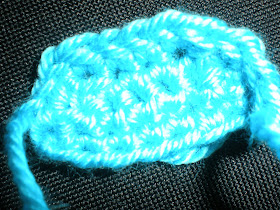
With orange, join w/ sc in bottom sc, sc around, sl st in the "valley" parts and in the side of sc in the "peaks"
Fasten off.
Sew to head.
Butt flame
With yellow, ch 7
Row 1: sc in 2nd ch from hook and each ch space across (6 sc)
Row 2-3: sc in each sc across
Row 4: sc across 2 sc, turn (2 sc)
Row 5: sc dec across (1 sc)
Row 6: sc in remaining sc (1 sc)
Fasten off.
Join with a sc in first unworked sc, repeat rows 4-6. Repeat once more.
In between long parts, sc dec 2 long parts together, turn, sc in that sc, F/O
Join orange, work around as for Head Flame
Fasten off.
Sew to butt.
Finishing
Out of felt, cut out the eye parts (see picture), and ears. Glue to head as shown. Embroider mouth if desired (optional).
*Quilava and Pokemon are copyright of Nintendo.
Sunday, November 27, 2011
Special Thanksgiving Day promotions
All my Ravelry patterns are going to be 75% off on Black Friday from 12-2 PM EST.
I am also offering a special promotion for Cyber Monday. The first 5 people who e-mail me at gundamgirlwing@hotmail.com with the subject heading Cyber Monday will get a 90% off coupon for all patterns.
You can find the patterns at my store here:
Jennifer Alberghini Designs
Get 'em while you can!
Edit: I've decided to extend the Cyber Monday sale to everyone. The coupon code is cyberm0n
Saturday, November 19, 2011
Marshtomp
I needed a break from making Christmas presents, so I turned to Nanette Crochet's Mudkip pattern, found here here But of course I can never just do something with my brain shut off and since I had the proper materials, I thought I may as well make its evolution Marshtomp, too. Fortunately, he was easy to do. The head, cheeks and long spike are her pattern; you can find them on the website above. The headfin, arms, legs, fins and belly patch are below.
Materials
Yarn in light blue, orange and black
Orange, black and pink felt or fabric paint
Small amount black embroidery thread (optional)
Stuffing
Body
With blue, ch 2
Rnd 1:6 sc in 2nd ch from hook (6 sc)
Rnd 2: 2 sc in each sc around (12 sc)
Rnd 3: sc in next sc, 2 sc in next sc around (18 sc)
Rnd 4: sc in next 2 sc, 2 sc in next sc around (24 sc)
Rnd 5: sc in next 3 sc, 2 sc in next sc around (30 sc)
Rnd 6: sc in next 4 sc, 2 sc in next sc around (36 sc)
Rnd 7: sc in next 5 sc, 2 sc in next sc around (42 sc)
Rnd 8-18: sc in each sc around
Rnd 19: sc in next 5 sc, sc dec in next 2 sc around (36 sc)
Rnd 20: sc in next 4 sc, sc dec in next 2 sc around (30 sc)
Rnd 21: sc in next 3 sc, sc dec in next 2 sc around (24 sc)
Rnd 22: sc in next 2 sc, sc dec in next 2 sc around (18 sc)
Rnd 23: sc in next 1 sc, sc dec in next 2 sc around (12 sc)
Rnd 24: sc dec around (6 sc)
Fasten off.
Arms (Make 2)
With blue, ch 8, join, being careful not to twist
Rnd 1: ch 1, sc in each ch sp around (8 sc)
Rnd 2-10: sc in each sc around
Fingers
Row 11: Working through both thickness, sc across 2 sc, turn
Row 12: sc dec (1 sc)
Row 13: sc across (1 sc)
Fasten off.
Join with a sc in same place as the 2nd sc on Row 11, sc across 2 sc, turn
Repeat rows 12-3
Join with sc in the 2nd sc of the second finger on Row 11, repeat previous instructions
Legs
With blue, ch 2
Rnd 1: 6 sc in 2nd ch from hook (6 sc)
Rnd 2: 2 sc in each sc around (12 sc)
Rnd 3: sc in next sc, 2 sc in next sc around (18 sc)
Rnd 4-9: sc in each sc around
Row 10: sc across 10 sc, turn, leaving remaining sc unworked (10 sc)
Row 11: sc in each sc across
Fasten off.
Belly oval
With orange, ch 4
Rnd 1: sc in 2nd ch from hook and next ch sp, 2 sc in last ch sp, turn and sc on other side, ending with a sc in same sp as first sc, sl st to first sc (6 sc)
Rnd 2: 2 sc in each sc around (12 sc)
Rnd 3: sc in next sc, 2 sc in next sc around (18 sc)
Rnd 4: sc in next 2 sc, 2 sc in next sc around (24 sc)
Fasten off.
Back Fins (Make 2, reversing shaping for 2nd)
With black, ch 7
Row 1: sc in 2nd ch from hook and each ch sp across (6 sc)
Row 2: 2 sc in first sc, sc in each sc across (7 sc)
Row 3: sc in each sc across, 2 sc in last sc (8 sc)
Row 4-5: repeat rows 2-3 (10 sc in last row)
Fasten off.
Head fin
With black, ch 8
Row 1: sc in 2nd ch from hook and each ch sp across (7 sc)
Row 2: sc dec in first 2 sc, sc in each sc across (6 sc)
Row 3: sc in each sc across, sc dec in last 2 sc (5 sc)
Row 4-7: repeat rows 2-3 twice(1 sc at end of row 7)
Sc in sc on Row 7 and along the side to Row 1
Fasten off.
Finishing
Sew all parts together. Cut out two eyes out of orange. Dab a tiny bit of black fabric paint (or alternatively, glue a small bit of felt) in the middle of each eye. Paint or make fabric mouth as shown. Embroider or paint the nail details and finger/fin details if you wish (not pictured).
*Marshtomp and Pokemon are copyright of Nintendo.
Sunday, November 13, 2011
Thomas the Tank Engine
This is a project I've been working on for a long time, partly because I have
to make 2 of them, partly because it took me a long time to find the right color. I ended up using a different brand yarn for each one (so if the pictures look different, you don't need to adjust your color settings) and I'm still not completely happy with either, but what can you do? (Besides hope that my cousins are both color-blind). My two Thomases are done in Vanna's Choice Baby Little Blue Boy and Red Heart Soft Yarn Teal, but if you find something that's closer to the original, please let me know and I'll post it on here. That being said, the project itself isn't difficult, just a lot of parts. I recommend labeling them as soon as you make them, so that when it comes time to sew them together, you know which is which. This pattern is still a work in progress, I will probably add more pictures as I put the finishing touches on Thomas 2 (it's almost finished, but for running out of yarn--you know how it is). And of course, if there are any mistakes or missing parts (which wouldn't surprise me in the least), please let me know and I'll fix it as soon as I can.
Materials
Yarn in blue, black, gray, white and red
Google eyes
Small amount black embroidery thread
Small amount yellow yarn
Black felt
Head
With gray, ch 2
Rnd 1: 6 sc in 2nd ch from hook (6 sc)
Rnd 2: 2 sc in each sc around (12 sc)
Rnd 3: sc in next sc, 2 sc in next sc around (18 sc)
Rnd 4: sc in next 2 sc, 2 sc in next sc around (24 sc)
Rnd 5: sc in next 3 sc, 2 sc in next sc around (30 sc)
Rnd 6: sc in next 4 sc, 2 sc in next sc aroun d(36 sc)
Rnd 7-8: sc in each sc around, in last sc of Rnd 8 change to black.
Rnd 9-15: sc in each sc around
Fasten off.
Nose: With gray, ch 2, 8 sc in 2nd ch from hook (8 sc)
Fasten off.
Sew to face.
Steam Stack
With black, ch 2
Rnd 1: 6 sc in 2nd ch from hook
Rnd 2: in front loops only, 2 sc in each sc around (12 sc)
Rnd 2: in back loops of Rnd 1 only, sc around (6 sc)
Rnd 3-10 (or until desired height): sc in each sc around
Body Front (the head will be sewn to this piece)
With blue, ch 21
Row 1: sc in 2nd ch from hoook and each ch space across (20 sc)
Row 2-6: sc in each sc across
Row 7: sl st in 8 sc, skip 2 sc, 5 dc in next sc, skip 2 sc, sl st, turn, leaving remaining sc unworked (5 dc)
Row 8: ch 2, dc in next dc, 2 dc in each dc around, skip 2 sc, sl st, turn (10 dc)
Row 9: ch 2, dc in next dc, 2 dc in each dc around (20 dc)
Fasten off.
Main Side (Make 2)
With blue, ch 21
Row 1: sc in 2nd ch from hoook and each ch space across (20 sc)
Row 2-6: sc in each sc across, ch 11 at the end of Row 6
Row 7: sc in 2nd ch from hook and each ch space and each sc across (30 sc)
Row 8-12: sc in each sc across
Fasten off.
Underside of front
With blue, ch 21
Row 1: sc in 2nd ch from hoook and each ch space across (20 sc)
Row 2-8 (or until length of the front part of the sides): sc in each sc across
Bottom front panel (to be attached to rows 1-6 of side)
With blue, ch 21
Row 1: sc in 2nd ch from hoook and each ch space across (20 sc)
Row 2-6: sc in each sc across
Fasten off.
Main Body Top
With blue, ch 21
Row 1: sc in 2nd ch from hoook and each ch space across (20 sc)
Row 2-32 (or until same length as body sides): sc in each sc across
Fasten off.
Back back
With blue, ch 21
Row 1: sc in 2nd ch from hoook and each ch space across (20 sc)
Row 2-4: sc in each sc across
Fasten off.
Back back
Repeat Back Front for Rows 1-2
Fasten off.
Back Top
With black, ch 11
Row 1: sc in 2nd ch from hook and each ch sp (10 sc)
Row 2-20: sc in each sc across
Fasten off.
Side Panel (Make 2)
With blue, ch 11
Row 1: sc in 2nd ch from hook and each ch space across (10 sc)
Row 2-12: sc in each sc across
Fasten off.
Back side panel (Make 2)
With blue, ch 9
Row 1: sc in 2nd ch from hoook and each ch space across (8 sc)
Row 2-12: sc in each sc across
Row 13: sl st in first 2 sc, sc in next sc across for left side, sc in 6 sc, leave remaining unworked for right(6 sc)
Row 14-16: sc in each sc across
Fasten off.
Coals
With black, ch 21
Row 1: sc in 2nd ch from hook and each ch space across (20 sc)
Row 2: sc in each sc across
Fasten off.
Back Bottom
With blue, ch 21
Row 1: sc in 2nd ch from hook and each ch space across (20 sc)
Row 2-12: sc in each sc across
Fasten off.
Wheel (Make 6)
With blue, ch 5 (counts as 1 dc and 1 ch sp)
Rnd 1: Dc in 5th ch from hook, *ch 1, dc in same space, repeat from * 8 more times, ch 1 and join in first dc (10 sc)
Connector (Make 2)
With blue, ch 25
Fasten off.
Bottom
With white, ch 21
Row 1: sc in 2nd ch from hook and each ch space across (20 sc)
Row 2-53:sc in each sc across (20 sc)
Fasten off.
Red pieces
Rnd 1: Joining red, sc in each sc across, 2 sc in last sc, sc along side, 2 sc in corner, sc across other side of ch row, 2 sc in last ch space, sc along side, sc in first sc of Row , sl st to first sc of round 1
Red back
Row 1: sc across from corner to corner, turn
Row 2-3: sc in each sc across
Fasten off.
Red front
Work Rows 1-2 of back
Sticky uppy thing
With blue, ch 2
Rnd 1: 6 sc in 2nd ch from hook (6 sc)
Rnd 2- :sc in each sc around
Fasten off.
Half circle things (Make 4)
With blue, ch 9
Row 1: sc in 2nd ch from hook and each ch space across (8 sc)
Row 2: sc dec in first 2 sc, sc across, sc dec in last 2 sc (6 sc)
Row 3: repeat Row 2 (4 sc)
Fasten off.
Join w/ sc in side of Row 1, sc up side, across row 3 and down other side.
Fasten off.
Middle piece
With blue, ch 5
Row 1: sc in 2nd ch from hook and each ch space across (4 sc)
Row 2-14: sc in each sc across (4 sc)
Fasten off.
Middle in between both pairs of circle things (Make 4)
With black, ch 11
Row 1: sc in 2nd ch from hook and each ch space across (10 sc)
Row 2-5: sc in each sc across
Fasten off.
Front circles (Make 2)
With black, ch 2
Rnd 1: 6 sc in 2nd ch from hook (6 sc)
Fasten off.
Finishing
Figure A
Figure B (front view)
Figure B (side view)
Sew main body pieces (body front and main sides) together as in Figure A. Sew back body pieces (back front, back top, back back, back bottom, side panels and back side panels) as shown in Figure B. Sew head to figure A. Sew figure A to figure B. Stuff. Sew white piece onto the bottom, leaving a lot sticking out in the front. Sew 3 wheels on each side and sew the chain to each wheel. Sew 2 half circle pieces on either side of 1 middle piece, stuff lightly. Sew onto white piece with the black piece in the middle. Sew top to the head.
Details
Glue or stick on googly eyes. Embroider eyebrows with black yarn, mouth with embroidery thread as shown.
Embroider with red yarn on main side as shown on each side of Thomas.
Embroider yellow 1 in the middle of main side on each side. Glue a square of black felt on each side.
Embroider red yarn on main top as shown, pulling somewhat tightly to make slight dents in the fabric.
Embroider two yellow circles on back front and two straight yellow lines in the middle. Sew front circles on red front and embroider a little black yarn in between them, making it stick out so that there's a space between the yarn and the fabric. Cut windows out of felt and glue under back top. Add any other remaining details.
*Thomas and Thomas & Friends are copyright Gullane (Thomas) Limited. This is an original pattern by Jennifer Alberghini. Please do not sell copies of this pattern or the dolls that you make from this pattern. You may link to this page, but do not repost it on your site. Thank you.
Thursday, October 27, 2011
Halloween Sale Going on Now!
All Ravelry patterns are $1 off until Monday. You can find them at my store here:
Jennifer Alberghini Designs
Thursday, October 13, 2011
Terriermon
Someone requested this on Ravelry awhile ago but I didn't have the materials to make him then. But when I got yarn to finish a baby blanket I've been making, but lacked the crochet hook to do it (thus are the hazards of moving), I was able to make this little guy in the meantime. He's small, about the size of my hand; one day I may make a bigger one. Or, if anyone wants to test the pattern for me, I can try multiplying the rounds to make it larger.
Edit: Added Lopmon picture. To make, change colors as listed below and add 2 smaller horns.
Materials
White yarn (Brown yarn)
Green yarn (Pink yarn) (small amount)
Black and white embroidery thread
Small amount black felt
Stuffing
Head
With white, ch 2
Rnd 1: 6 sc in 2nd ch from hook (6 sc)
Dnd 2: 2 sc in each sc around (12 sc)
Rnd 3: sc in next sc, 2 sc in next sc around (18 sc)
Rnd 4: sc in next 2 sc, 2 sc in next sc around (24 sc)
Rnd 5: sc in next 3 sc, 2 sc in next sc around (30 sc)
Rnd 6-10: sc in each sc around
Rnd 11: sc in next 3 sc, sc dec in next 2 sc around (24 sc)
Rnd 12: sc in next 2 sc, sc dec in next 2 sc around (18 sc)
Rnd 13: sc in next 1 sc, sc dec in next 2 sc around (12 sc)
Rnd 14: Sc dec around (6 sc)
Fasten off.
Body
With white, ch 2
Rnd 1: 6 sc in 2nd ch from hook (6 sc)
Dnd 2: 2 sc in each sc around (12 sc)
Rnd 3: sc in next sc, 2 sc in next sc around (18 sc)
Rnd 4-8: sc in each sc around
Rnd 9: sc in next 1 sc, sc dec in next 2 sc around (12 sc)
Rnd 10: sc dec around (6 sc)
Fasten off.
Bib
Ch 6
Row 1: sc in 2nd ch from hook and each sc across (5 sc)
Row 2: sc dec in first 2 sc, sc in next sc, sc dec in last 2 sc (3 sc)
Row 3: sc dec in first 2 sc, sc dec in 2nd sc again and last sc (2 sc)
Row 4: sc dec (1 sc)
Fasten off.
Sew to body.
Sew body to head.
Arms (make 3)
With green, ch 2
Rnd 1: 4 sc in 2nd ch from hook (4 sc)
Rnd 2: sc in each sc around, change to white in laswt stitch
Rnd 3-6 (or until desired length): sc in each sc around
Rnd 7: fold in half, sc through both thicknesses (2 sc)
Fasten off.
Sew to body.
Legs (make 2)
With green, ch 2
Rnd 1: 6 sc in 2nd ch from hook, change to white in last sc (6 sc)
Rnd 2: sc in each sc around
Fasten off.
Sew to body.
Ears (make 2)
With white, ch 5
Row 1: sc in 2nd ch from hook and in each ch sp across (4 sc)
Row 2-14: sc in each sc across, at end of Row 14 change to green
Row 15-6: sc in each sc across
Row 17: ch 3, sl st in first sc, sl st in next sc, ch 3, sl st in next sc, ch 3, sl st in last sc
Fasten off.
Ear bands (make 4)
With green, ch 4
Row 1: sc in 2nd ch from hook and in each ch sp across (3 sc)
Fasten off.
Sew to ears.
Sew ears to head.
Horn
With white, ch 2
Row 1: sc in 2nd ch from hook (1 sc)
sc across until desired length
Sl st in last row.
Fasten off.
Folding the last row, sew to head with Row 1 at top.
Finishing
Cut eyes and nose out of black felt. Glue to head. Embroider mouth, eye catches and
finger and toe nails.
Terriermon and Digimon are copyright of Bandai/Toei Animation. Please do not sell this pattern or post it to your website. You may link to this page.
Monday, October 3, 2011
New Fall Pattern for Sale
Tuesday, September 13, 2011
Sewaddle
Materials
Yarn in yellow, white and green
Orange pompoms
Fabric paint in black and white (Instead of painting the eyes, you can use black buttons with a spot of white paint in the middle--that's what I would have originally used if I hadn't lost them.)
Glue
Small amount of felt for mouth.
Head
With yellow, ch 2
Rnd 1: 6 sc in 2nd ch from hook (6 sc)
Rnd 2: 2 sc in each sc around (12 sc)
Rnd 3: Sc in next sc, 2 sc in next sc around (18 sc)[Note: for smaller head, eliminate this round and proceed to Rnd 4)
Rnd 4-7: sc in each sc around, begin stuffing
Rnd 8: Sc in next 1 sc, sc dec in next 2 sc around (12 sc)
Rnd 9: Sc dec around (6 sc)
Fasten off.
Antennae
Ch 2
Rnd 1: 3 sc in 2nd ch from hook (3 sc)
Rnd 2: sc in each sc around
Fasten off.
Sew to top of head.
Mouth
With white, ch 2
Rnd 1: 4 sc in 2nd ch from hook (4 sc)
Rnd 2: 2 sc in each sc around (8 sc)
Rnd 3: sc in next sc, 2 sc in next sc around (12 sc)
Fasten off.
Sew to head.
Body
With green, ch 2
Rnd 1: 6 sc in 2nd ch from hook (6 sc)
Rnd 2-6: sc in each sc around
Fasten off.
Stuff lightly, sew to head in back loops only in 3 sc
Leaves
Sides (Make 2)
Ch 2
Row 1: 3 sc in 2nd ch from hook (3 sc)
Row 2-4: sc in each sc around
Row 5: sc dec in each sc (1 sc)
Sc along side, with a sc dec in the middle to form a curve
Fasten off.
Middle leaf
Row 1: ch 4, sc in 2nd ch from hook and each ch sp across (3 sc)
Row 2: 2 sc in 1st sc, sc in next sc, 2 sc in last sc (5 sc)
Row 3-10: sc in each sc across
Row 11: sc dec in first 2 sc, sc in next sc, sc dec in last 2 sc (3 sc)
Row 12: sc dec in first 2 sc, sc in last sc (2 sc)
Row 13: sc dec in remaining sc, make 3 sc down side, sl st in row 11, sc to opposite side of ch, sl st in corner space, sc in opposite side of ch across, sl st in corner space, sc back to top ( with a sl st in row 11) and sl st in first sc of Row 13, fasten off.
Sew leaves together and sew to head.
Finishing
Glue or paint eyes onto head. Cut out mouth felt in shape as shown and glue protuding over the mouth. Make two tiny dots on the bottom for fangs. Glue three pompoms on each side.
*Sewaddle and Pokemon are the property of Nintendo.
Wednesday, August 17, 2011
Sunday, August 7, 2011
Nats, Bats and other creatures
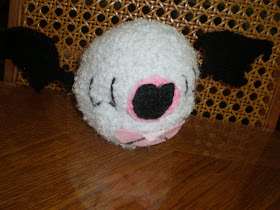
Here's a simple pattern that can be modified for a lot of different creatures, Pokemon or otherwise. A good way to use up your stash of fashion yarns that you didn't know what to do with. I added the details for the patterns you see here, Woobat, Venonat and Igglytuff, but you can add your own things and make whatever you like.
Basic body pattern
Materials
1 skein fashion yarn in desired color
Hook to correspond to yarn size (sample projects used a J hook for this step)
Detail yarn in worsted weight (see individual patterns for specifics)
Instructions
Ch 2
Rnd 1: 6 sc in 2nd ch from hook (6 sc)
Rnd 2: 2 sc in each sc around (12 sc)
Rnd 3: Sc in next sc, 2 sc in next sc around (18 sc)
Rnd 4: Sc in next 2 sc, 2 sc in next sc around (24 sc)
Rnd 5: Sc in next 3 sc, 2 sc in next sc around (30 sc)
Rnd 6: Sc in next 4 sc, 2 sc in next sc around (36 sc)
Rnd 7: Sc in next 5 sc, 2 sc in next sc around (42 sc)
Rnd 8: Sc in next 6 sc, 2 sc in next sc around (48 sc)
Rnd 9: Sc in next 7 sc, 2 sc in next sc around (54 sc)
Rnd 10: Sc in next 8 sc, 2 sc in next sc around (60 sc)
Rnd 11-3: sc in each sc around
Rnd 14: Sc in next 8 sc, sc dec in next 2 sc around (54 sc)
Rnd 15: Sc in next 7 sc, sc dec in next 2 sc around (48 sc)
Rnd 16: Sc in next 6 sc, sc dec in next 2 sc around (42 sc)
Rnd 17: Sc in next 5 sc, sc dec in next 2 sc around (36 sc)
Rnd 18: Sc in next 4 sc, sc dec in next 2 sc around (30 sc)
Rnd 19: Sc in next 3 sc, sc dec in next 2 sc around (24 sc)
Rnd 20: Sc in next 2 sc, sc dec in next 2 sc around (18 sc)
Rnd 21: Sc in next 1 sc, sc dec in next 2 sc around (12 sc)
Rnd 22: Sc dec around (6 sc)
Fasten off.
Venonat
Materials
Worsted weight yarn in pink (preferably 2 shades), and off-white
Crochet hook (sample used a size G)
Glue
Small amount of felt or fabric paint for fangs
Small amount black yarn for feet
2 Q-tips
Eyes
With pink, ch 2
Rnd 1: 6 sc in 2nd ch from hook (6 sc)
Rnd 2: 2 sc in each sc around (12 sc)
Rnd 3: Sc in next sc, 2 sc in next sc around (18 sc)
Rnd 4: sc in each sc around
Fasten off.
Sew to body.
Nose
With other pink (or same, depending on your stash) ch 3
Rnd 1: sc in 2nd from hook, 2 sc in next sc, turn piece around, sc in other side of first sc (4 sc)
Rnd 2: 2 sc in next sc, sc in next sc, repeat around (6 sc)
Fasten off.
Sew to body under eyes. Add fangs.
Arm (Make 2)
With off-white, ch 2
6 sc in 2nd ch from hook, turn
Ch 3, sl st in next sc, ch 3, sl st in next sc, ch 3, sl st in last sc
Fasten off
Sew to body.
Leg (Make 2)
Ch 2
Rnd 1: 6 sc in 2nd ch from hook (6 sc)
Rnd 2: 2 sc in each sc around (12 sc)
Rnd 3-4: sc in each sc around
Rnd 5: sc dec around (6 sc)
Rnd 5-10: sc in each sc around
Fasten off.
Sew to body.
With black, embroider a wedge in the middle to separate toes.
Finishing
Glue Q-tips to top of head.
Woobat
Materials
Worsted weight yarn in pink and black
Felt/fabric paint in pink and white
Sticks or dowels for support
Glue
Nose
With pink, ch 2
Rnd 1: 6 sc in 2nd ch from hook (6 sc)
Rnd 2: 2 sc in each sc around (12 sc)
Rnd 3: 2 sc in first sc, sc in next 5 sc, 2sc in next sc, sc in remaining sc (14 sc)
Rnd 4: 2 sc in first sc, sc in next 6 sc, 2 sc in next sc, sc in remaining sc (16 sc)
Fasten off.
Heart
With black, ch 5
Row 1: sc in 2nd ch from hook and each ch sp across (4 sc)
Row 2: 2 sc in first sc, sc in next sc, sc dec in next 2 sc (4 sc)
Row 3: sc dec in first 2 sc, sc in next sc, 2 sc in last sc (4 sc)
Row 5: sc in each sc across (4 sc)
Fasten off.
Row 1: On other side of beginning ch loops, join with sc (*Note, make sure that the the inc and dec are in the same direction, if not join to other side of ch) and sc across (4 sc)
Row 2: 2 sc in first sc, sc in next sc, sc dec in last 2 sc (4 sc)
Row 3-4: repeat Rows 3-4 as for other side
Do not fasten off.
Ch 1 and sc in side of Row 2 and each row across bottom for 7 sc, ch 1 and sc across Row 1 of other side, sl st to edge of Row 1 and fasten off.
Wings (Make 2)
With black, ch 3
Row 1: sc in 2nd ch from hook and each ch sp across (2 sc)
Row 2-6: sc in each sc across
Row 7: 2 sc in each sc across (4 sc)
Row 8: sc in next sc, 2 sc in next sc across (6 sc)
Row 9: sc in next 2 sc, 2 sc in next sc across (8 sc)
Row 10: sc in next 3 sc, 2 sc in next sc across (10 sc)
Row 11: sc in next 4 sc, 2 sc in next sc across (12 sc)
Row 12: sc in next 5 sc, 2 sc in next sc across (14 sc)
Row 13: sc in next 6 sc, 2 sc in next sc across (16 sc)
Row 14: sc in next 7 sc, 2 sc in next sc across (18 sc)
Row 15: sc in next 8 sc, 2 sc in next sc across (20 sc)
Row 16: sl st in first 5 sc, sc in next sc across, sc dec in last 2 sc (14 sc)
Row 17: sc dec in first 2 sc, sc in each sc across (13 sc)
Row 18: sc across, sc dec in last 2 sc (12 sc)
Row 19: sc dec in first 2 sc, sc in remaining sc across (11 sc0
Row 20-22: repeat Rows 18-19 (9 sc at end of Row 22)
At end of Row 22, ch 5
Row 23: sc in 2nd ch from hook and each ch sp and sc across, sc dec in last 2 sc (12 sc)
Row 24: sc dec in first 2 sc, sc across, leave last 2 sc unworked (9 sc)
Row 25: Sl st in each sc across, sl st to unworked sc of previous row
Fasten off.
Finishing
Glue dowels to back of wings and let dry. Stick inside and glue to body. Embroider eyes as shown. Glue or sew on felt mouth, cutting or painting on a white tooth and lines for tongue.
Igglybuff
Hair (Make 3)
Rnd 1: 6 sc in 2nd ch from hook (6 sc)
Rnd 2: 2 sc in each sc around (12 sc)
Rnd 3-4: sc in each sc around
Rnd 5: sc dec around (6 sc)
Fasten off.
Stuff lightly if desired, sew 3 pieces together, the middle one slightly on top of the others. Sew to top of body.
Arm (Make 2)
Ch 2
Rnd 1: 3 sc in 2nd ch from hook (3 sc)
Rnd 2: 2 sc in each sc around (6 sc)
Rnd 3-7: sc in each sc around
Fasten off.
Sew to body.
Feet (Make 2)
Repeat Rnds 1-7 of arms
Fold in half and working through both thickness, sc across (3 sc)
Fasten off.
Sew to body.
Finishing
With fabric paint or felt, make eyes and mouth. Paint or embroider spiral in between eyes.
*Pokemon is copyright to Nintendo.
Wednesday, July 20, 2011
Homer Simpson
My cousin loves the Simpsons, so I made this Homer for her birthday. I'm not sure which family member I'll make next, it depends on what she likes, but with respect to her anyway, birthday and Christmas presents will be easy. I had trouble finding a good yellow though so I ended up doubling up a crochet thread (I used Aunt Lydia's Goldenrod). I'd love to see it in worsted weight yarn.
Update: Here's a picture of a worsted weight version I made for my father.
Head
With yellow, ch 2
Rnd 1: 6 sc in 2nd ch from hook (6 sc)
Rnd 2: 2 sc in each sc around (12 sc)
Rnd 3: Sc in next sc, 2 sc in next sc around (18 sc)
Rnd 4: Sc in next 2 sc, 2 sc in next sc around (24 sc)
Rnd 5: Sc in next 3 sc, 2 sc in next sc around (30 sc)
Rnd 6-15: Sc in each sc around
Rnd 16: Sc in each sc around to last 5 sc, 2 sc in each of last 5 sc (35 sc)
Rnd 17: Sc in each sc around
Rnd 18: Sc in each sc around to last 10 sc, sc dec in last 10 sc (30 sc)
Rnd 19-20: sc in each sc around
Rnd 21: Sc in next 3 sc, sc dec in next 2 sc around (24 sc)
Rnd 22: Sc in next 2 sc, sc dec in next 2 sc around (18 sc)
Rnd 23: Sc in next 1 sc, sc dec in next 2 sc around (12 sc)
Rnd 24: Sc dec around (6 sc)
Fasten off.
Nose
Ch 2
Rnd 1: 4 sc in 2nd ch from hook (4 sc)
Rnd 2: sc in each sc around
Fasten off.
Ears (Make 2)
Ch 2
Rnd 1: 3 sc in 2nd ch from hook (3 sc)
Fasten off.
Eyes (Make 2)
With white, ch 2
Rnd 1: 6 sc in 2nd ch from hook (6 sc)
Rnd 2: 2 sc in each sc around (12 sc)
Fasten off.
Shirt and pants
Ch 16
Row 1: sc in 2nd ch sp and each ch across (15 sc)
Row 2-3: sc in each sc across, at end of row 3 join with a sl st to first sc
Rnd 4: 2 sc in each sc around (30 sc)
Rnd 5: sc in next sc, 2 sc in next sc around (45 sc)
Rnd 6-9: sc in each sc around
Rnd 10: sc around, make 2 dec on each side of body for armpit (41 sc)
Rnd 11: sc around, 2 dec on each side (37 sc)
Rnd 12-16: sc in each sc around
Rnd 17: sc in each sc around to front, 2 sc in each of 10 sc (for beer belly), sc in remaining sc (47 sc)
Rnd 18: sc in each sc around to belly, sc in next sc, 2 sc in nex sc across belly, sc in remaining sc around (57 sc)
Rnd 19:sc around to belly, sc in next 2 sc, 2 sc in next sc across belly, sc in remaining sc around (67 sc)
Rnd 20-21: sc in each sc around
Rnd 22: sc around to belly, sc in next 2 sc, sc dec in next 2 sc across belly, sc in remaining sc around (57 sc)
Rnd 23:sc around to belly, sc in next sc, sc dec in next 2 sc across belly, sc in remaining sc around (47 sc)
Rnd 24: sc around to belly, sc dec in next 2 sc across belly, sc in remaining sc around (37 sc)
Rnd 25: sc in each sc around
For pants, change to blue
Rnd 26-33: sc in each sc around
Rnd 34: sc across 10 sc, ch 9, on the other side of the last round, make 8 sc and join to the first sc of Rnd 34 (18 sc, 9 ch sp)
Rnd 35: sc in each sc and ch space around (27 sc)
Rnd 36-7: sc in each sc around
Rnd 38: sc in next sc, sc dec in next 2 sc around (18 sc)
Rnd 39-55: sc in each sc around
Fasten off.
Other leg
Join in unworked sc of Rnd 33
Rnd 34: sc around sc and ch sp, dec if necessary to make 27 sc)
Rnd 35-37: sc in each sc around
Rnd 38: sc in next sc, sc dec in next 2 sc around (18 sc)
Rnd 39-55: sc in each sc around
Fasten off.
Foot (Make 2)
Ch 2
Rnd 1: 6 sc in 2nd ch from hook (6 sc)
Rnd 2: 2 sc in each sc around (12 sc)
Rnd 3: Sc in next sc, 2 sc in next sc around (18 sc)
Rnd 4-13: sc in each sc around
Begin Stuff
Rnd 14: Sc in next 1 sc, sc dec in next 2 sc around (12 sc)
Rnd 15: Sc dec around (6 sc)
Fasten off.
Arm (Make 2)
With yellow, ch 2
6 sc in 2nd ch from hook (6 sc)
2 sc in each sc around (12 sc)
Rmd 3-25: sc in each sc around
Fasten off
Sleeve (Make 2)
With white, ch 7
Row 1: sc in 2nd ch from hook and each ch sp across, turn (7 sc)
Row 2-3: sc in each sc across
Row 4: sc dec in first 2 sc, sc across to last 2 sc, sc dec in last 2 sc (5 sc)
Row 5: repeat row 4 (3 sc)
Round 6: sc in sc across row 5, ch 1, sc around side of rows, ch 1, sc across other side of ch loops, ch 1, sc across opposite side, sl st to first sc.
Fasten off.
Collar
Ch 14
Row 1: sc in 2nd ch from hook and each ch space across (14 sc)
Row 2: sc in each sc across
Fasten off.
Sew to top of body.
Finishing
Sew eyes, nose and ears to head. With fabric paint or embroidery thread, make the black parts on the eyes. With black thread, embroider a zig zag above each ear and 2 straight stitches on top of head for hair. Sew head to body using yellow, sew collar opening closed. Sew feet to legs, make a straight stitch on each leg with black for cuffs. Sew arms to body, leaving some sc free to sew to sleeve parts. Sew sleeves to body, stuffing lightly. Embroider finger and thumbs with black. With tan felt (for crochet thread version anyway, if you want to crochet it, just use head rounds until it's large enough) and draw (I used a regular ball point pen) or embroider the mouth. And that's Homer!
*The Simpsons belong to FOX.